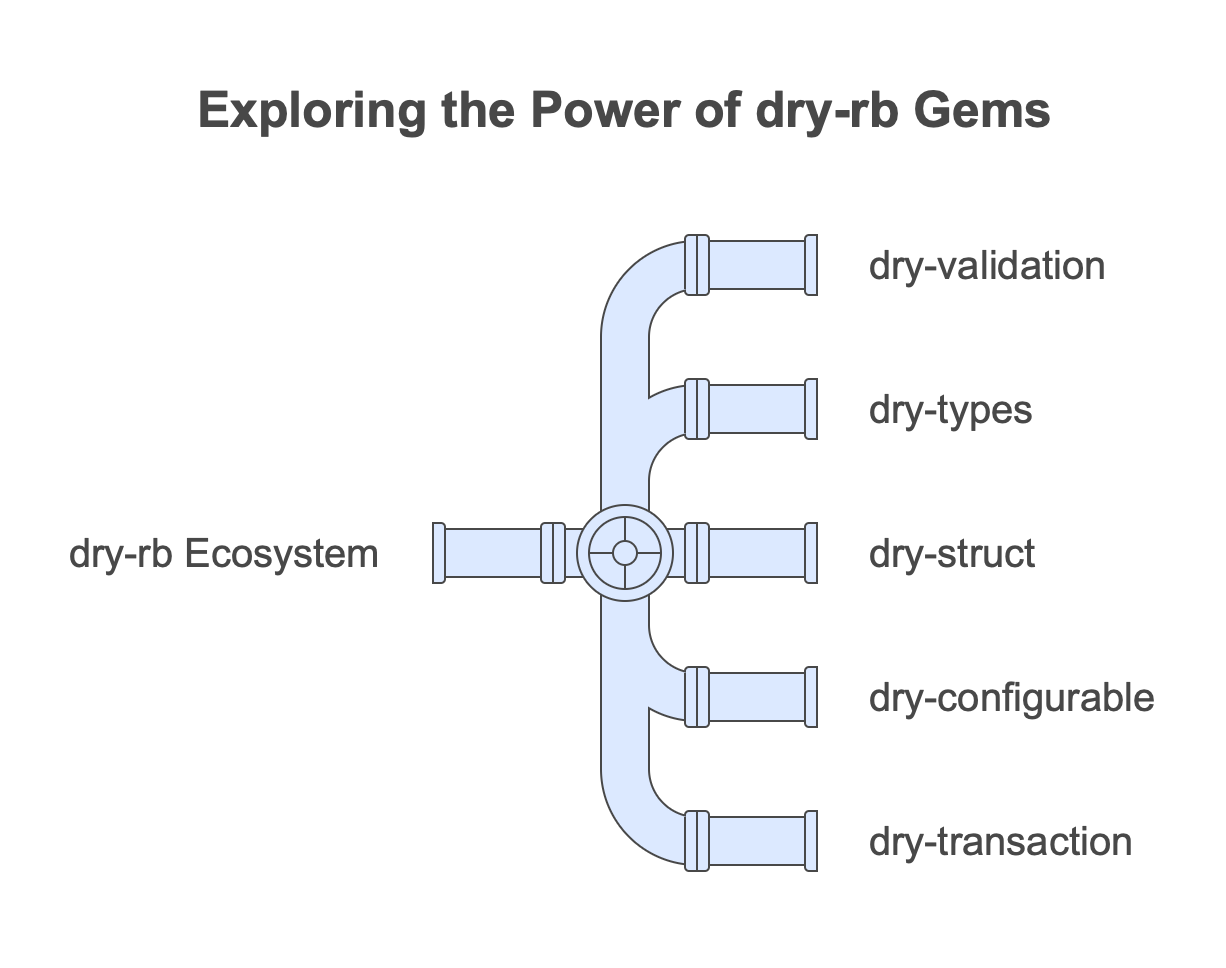
Rails is known to prioritize productivity, performance, and writing beautiful code, this new version is not an exception. Let’s dive into some of the most thrilling additions to Rails 7.1 and provide examples for a clearer understanding.
Rails 7.1 enhances its support for modern JavaScript, allowing developers to write more interactive and responsive applications with ease. This means you can easily return JavaScript code from your controller actions. Yes it’s not that new but it’s good to remember you can do this easily. There’s also turbo and hotwire, more on that latter.
Example:
class PostsController < ApplicationController
def create
@post = Post.new(post_params)
if @post.save
respond_to do |format|
format.turbo_stream
format.html { redirect_to @post }
format.js # Automatically looks for a corresponding .js.erb file
end
else
render :new, status: :unprocessable_entity
end
end
end
Thanks to format.js
block, if a JavaScript request is made to the create
action, Rails will automatically search for a create.js.erb
file in the
views/posts
directory, allowing you to easily manage JavaScript responses.
Security is a real thing for every developer and product owner nowadays. Rails 7.1 introduces encrypted attributes, making it easier to add another layer of security to your applications. This feature allows developers to encrypt model attributes directly in the database, ensuring that sensitive information is protected.
Example:
class User < ApplicationRecord
encrypts :email, :ssn
end
With this single line, the User
model will encrypt email
and ssn
attributes. Rails will handle the encryption and decryption automatically,
hiding the complexity from developers and making it easy to work with encrypted
data.
So if you’re database is stolen, you know that these attributes are encrypted and will be harder to be decoded and disclosed.
Building on top of encrypted attributes, “at-work” encryption support in Rails 7.1 ensures that data can be encrypted not only at rest but also when it’s being used. This feature is particularly useful for highly sensitive applications that require an additional layer of security.
Example:
class SensitiveDocument < ApplicationRecord
encrypts :body, at_work: true
end
In this example, the body
attribute of the SensitiveDocument
model would be
encrypted even when it’s loaded into memory, ensuring that sensitive information
remains secure through the entire lifecycle of the data.
That’s another level of security since even if the attacker can read your system memory, those data will be encrypted.
And yes I know that if the whole system is compromised there’s a lot of chances that the attacker have access to encrypt keys and so on. But it’s still another level of security.
Lastly, Rails 7.1 continues to strengthen its integration with Hotwire and Turbo, providing developers with improved tools for building rich, interactive user interfaces without the complexity of traditional SPA frameworks.
Example:
In Rails 7.1, improvements to Turbo Streams allow for more intuitive and flexible partial updates to the DOM, enabling real-time updates to the user interface with minimal code and optimal performance.
I like to think Elixir and Phoenix are pushing this forward.
turbo_stream.update "message_1", partial: "messages/message", locals: { message: @message }
In this line of Turbo Stream, we update a specific DOM element by its ID with a partial, seamlessly rendering updates in real-time.
Rails 7.1 is yet another step forward in making web development more efficient, secure, and enjoyable. With its blend of new features aimed at enhancing productivity, security, and performance, developers are empowered to build sophisticated, modern web applications with ease.
Now a first-class citizen. When you bootstrap a new app you’ll have a
Dockerfile
at the root of you project that allows to run your app in a
container with no further configuation.
Something I also know as a Phoenix
core feature. When you bootstrap an app (or
even afterward), you can generate some kind of authentication scaffold you can
build on.
Really handy if you don’t need a full-fledge authentication system with X oauth systems or specific mechanisms.
It based upon has_secure_password
an so on.
I can’t remember when it was introduced but since some releases Rails (ActiveRecord) can trigger async queries that helps to avoid blocking in controller actions or methods. This has been extended with even more methods.
Rails seems to be more and more stable and focus on tooling that will help developers work on daily basis.
Don’t forget there’s alternatives in the Ruby ecosystem such as
Hanami. The community is much smaller and there’s a
long way to go but don’t be to closed-minded. Ruby ecosystem is really nice and
it’s not limited to Ruby on Rails
.
At its core, SourceHut offers version control system (VCS) hosting for both Git and Mercurial, two of the most popular distributed source control management systems. But that’s just the tip of the iceberg. The platform extends its offerings to include issue tracking, a build service, mailing lists, wikis, and a host of other well-documented and intelligently designed tools. It’s an all-in-one solution that instantly piqued my curiosity, compelling me to dive deeper and explore its capabilities firsthand.
Admittedly, the transition wasn’t seamless, primarily due to my long-standing familiarity with GitHub’s workflow. SourceHut aims to harness the inherent functionalities of the underlying tools, such as utilizing Git patches for change sharing, in lieu of proprietary user interfaces or workflows. These patches are dispatched via mailing lists where they are open to discussion and refinement — a practice that harkens back to the roots of open-source collaboration.
With that framework in mind, I embarked on a project to set up a Git repository on SourceHut, with the objective of automating the build process for my static website and deploying it to my web server. The experience, while initially daunting due to my unfamiliarity with Alpine Linux, was surprisingly straightforward.
The initial step involves creating an account on SourceHut and subsequently creating a repository. It’s essential to note that build automation is a premium feature, accessible only to paid accounts. However, the barrier to entry is minimal, with a one-month subscription available for as little as $2 — a nominal fee to experiment with the platform’s full potential.
For this demonstration, I’ll use Jekyll, a popular Ruby-based static site generator, to build my blog. While this post will not delve into the specifics of Jekyll, the general workflow outlined should be applicable irrespective of the static site generator employed.
SourceHut simplifies the setup of continuous integration pipelines through the
introduction of a .build.yml
file to your repository. The structure and syntax
of this file dictate the build process, leveraging SourceHut’s curated images
without the need for Dockerfiles.
image: alpine/latest
packages:
- rsync
- ruby-dev
- ruby-full
secrets:
- secret_uuid
sources:
- https://git.sr.ht/~user/mywebsite
tasks:
- deploy: |
cd mywebsite
[ "$(git rev-parse master)" = "$(git rev-parse HEAD)" ] || complete-build
sudo gem install bundler
bundle install
JEKYLL_ENV=production jekyll build
rsync -az --no-t --no-p --delete -e "ssh -o UserKnownHostsFile=/dev/null -o StrictHostKeyChecking=no" _site/ user@server.example.com:/path/to/website/
A common requirement in the deployment workflow is the use of secrets, such as
private keys, for secure file transfer or encryption. Additionally, it’s
advisable to conditionally execute certain actions based on the active branch.
For instance, you might want to halt the build process prematurely if not on the
main branch, using the complete-build
command. While this command is not
officially documented, acknowledging its existence and potential future changes
could save newcomers significant time.
My exploratory journey with SourceHut was both enlightening and fulfilling. The process of automating my website’s deployment was less daunting than anticipated, facilitated by SourceHut’s intuitive build system. While I remain undecided on whether to transition my workflow permanently from GitHub to SourceHut, the experiment underscored the feasibility and efficiency of SourceHut’s tools for various development tasks, from compiling and testing patches to deploying websites and publishing packages.
]]>Gnus is a beast it can do a lot of things from newsgroups, to RSS to emails. So configuring and using it can be a bit scary at first.
There’s a really widespread misinformation about Gnus. I thought for long it was true but it comes out it wasn’t.
This is about using multiple SMTP servers seamlessly for sending
emails. I always read you have to use external tools such as
MSMTP with specific configuration to make
it acts as a proxy between your software and your multiple remote
SMTP. Some other advice you to use a homemade function to play with
message fields and hook it via message-send-hook
.
Some will even tell you to hack your /etc/hosts
.
But hey, Gnus is there since the nineties. Someone must have think of a solution and it must be built-in!
I stopped searching blog posts and Stack Overflow and read the manual entry which clearly states that you can set up a complex workflow using multiple SMTP servers.
This works by using posting styles which is a way to instruct Gnus of how you want to prepare your email (headers, body, signature) according to the context.
Before digging into it I’d like to explain my IMAP settings because it’s tightly related to how we’re going to setup SMTP.
So let’s take a look at the “select-method” definitions. This is where we tell Gnus about our IMAP servers, their local name and how they must behave:
(setq gnus-select-method '(nnnil nil))
(setq gnus-secondary-select-methods
'((nnimap "home"
(nnimap-address "imap.gmail.com")
(nnimap-server-port "imaps")
(nnimap-stream ssl)
(nnir-search-engine imap)
(nnmail-expiry-target "nnimap+home:[Gmail]/Trash")
(nnmail-expiry-wait 'immediate))
(nnimap "work"
(nnimap-address "imap.gmail.com")
(nnimap-server-port "imaps")
(nnimap-stream ssl)
(nnir-search-engine imap)
(nnmail-expiry-target "nnimap+work:[Gmail]/Trash")
(nnmail-expiry-wait 'immediate))))
We set gnus-select-method
to nnnil
which is a NOOP back-end. I
prefer to set all the accounts in the same place
gnus-secondary-select-methods
.
In this variable I have declared two IMAP servers. The first one will
be known locally as home
and the second one as work
.
Both are using Gmail, so we have to find a way to distinguish these to account to provide credentials.
The standard Unix way to share credentials across software is to
store them in ~/.authinfo
file. In my case I use ~/.authinfo.gpg
so my credential are encrypted with GPG and no one but me can read it.
Here is the content of ~/.authinfo.gpg
:
machine home login home@gmail.com password my_pasword port imaps
machine work login work@gmail.com password my_other_password port imaps
Now Gnus can read this file to get the credentials and log on the IMAP
servers. Gnus know how to bind a given credential to a specific
account because their share the same name home
and work
.
Ok from now on, we can get emails from Gnus through these two email accounts.
Now it’s time to configure these accounts to send emails using their respective SMTP server / credential.
Just for the sake of clarity, I do use the same IMAP / SMTP addresses for both accounts in my situation but this technique would work the same way with two accounts on two different email providers.
All the magic happens by taking advantage of Gnus posting styles:
;; Reply to mails with matching email address
(setq gnus-posting-styles
'((".*" ; Matches all groups of messages
(address "Nicolas Cavigneaux <home@gmail.com>"))
("work" ; Matches Gnus group called "work"
(address "Nicolas Cavigneaux <work@gmail.com>")
(organization "Corp")
(signature-file "~/.signature-work")
("X-Message-SMTP-Method" "smtp smtp.gmail.com 587 work@gmail.com"))))
The first line with the .*
is kind of catch-all rule which tells
Gnus that no matter what is the group I’m in, my sender email address
is going to be home@gmail.com
.
For those who are not familiars with Gnus, a group is just an IMAP folder.
Then the second rule tells Gnus, if the current group matches anything
with work
in it then I want to handle my outgoing emails
differently. My sender address is going to be work@gmail.com
, my
organization
header is going to be Corp
, my automatically inserted
signature at the bottom of the email is going to be read from
~/.signature-work
file and here happens the magic we use a
special header that Gnus and message-mode
understand called
X-Message-SMTP-Method
that was designed for this exact purpose,
being able to specify an alternative SMTP server to use. So we specify
that we want to use smtp
protocol using the address smtp.gmail.com
on port 587
and that the user account to use is work@gmail.com
.
There’s one last thing to setup and you’ll be good to go. You need to
provide your SMTP credentials. Once again it takes place in the
~/.authinfo
file:
machine smtp.gmail.com login home@gmail.com password my_password port 587
machine smtp.gmail.com login work@gmail.com password my_other_password port 587
By searching the server name / username Gnus will be able to know the right credential to use.
It basically enables multi SMTP accounts in Gnus without bothering with any of these techniques.
Moral of the story, when it comes to Emacs you should always read the official doc first since most of the time you’ll find the info you need.
]]>Elixir is a functional language and as such it’s very common to feed a function with the return of another one like so:
length(String.split(line))
It can quickly become are to read so Elixir provides a syntactic sugar to pipe a function return to another one:
line
|> String.split()
|> length()
Easier on the eyes isn’t it?
I like this syntactic sugar a lot but I hate to type it. It’s not an easy one on azerty or bépo layouts.
As an Emacs user I can finely customize everything so I decided to pimp the elixir-mode to make the pipe operator easy to use.
First of all we need a function that will describe what we want to do:
(defun bounga/insert-elixir-pipe-operator ()
"Insert a newline and the |> operator"
(interactive)
(end-of-line)
(newline-and-indent)
(insert "|> "))
We defined the function bounga/insert-elixir-pipe-operator
that:
If you try it by calling M-x bounga/insert-elixir-pipe-operator
in a
buffer, you’ll see it does what we want.
To use this new function effectively you should bind it to a key chord (a keyboard shortcut).
We’ll bind the function to M-RET
(Alt + Enter on most keyboards).
Depending on the way you handle your packages there’s two ways of setting it up.
(define-key elixir-mode-map (kbd "M-RET") 'bounga/insert-elixir-pipe-operator)
(use-package elixir-mode
:bind (:map elixir-mode-map
("M-RET" . bounga/insert-elixir-pipe-operator)))
Now you’re good to go!
If you’re in an Elixir buffer then M-RET
will insert a new line and
add the pipe operator whether you’re at the end of the line, at the
beginning or in the middle of it.
Let’s see it in action:
Have fun with Emacs and Elixir!
]]>It’s useful to send massive quantity of emails, fetch and store info from a remote API on regular basis, resize images, batch import large files, update a knowledge database, cleanup things and so on.
If you’re coming from Ruby like me you’re maybe used to relying on tools like Sidekiq, Delayed::Job, Resque or something similar to asynchronously execute tasks in the background.
All of the gems listed above are really great solutions for the Ruby eco-system but require external dependencies.
Using Elixir and OTP you have all you need at your disposal to handle background and scheduled tasks. Erlang was designed with this need in mind at core level.
It’s really going to be a piece of cake.
We’ll do this with zero external dependencies (no database, no Redis, no nothing) and it will take only a few lines of code to do the job.
Here is the module responsible for scheduling a task:
defmodule MyApp.Scheduler do
use GenServer
def start_link(_args) do
GenServer.start_link(__MODULE__, %{})
end
def init(state) do
schedule_work()
{:ok, state}
end
def handle_info(:work, state) do
MyApp.SomeModule.do_some_long_job()
schedule_work()
{:noreply, state}
end
defp schedule_work() do
Process.send_after(self(), :work, 2 * 60 * 60 * 1000)
end
end
This module uses GenServer
behavior that will do all the
heavy-lifting for us. It can now keep state, execute code
asynchronously and so on.
Let’s dig into it function by function.
There’s one mandatory function that brings our module to life, the
init/1
function. Its purpose is to initialize our server state.
def init(state) do
schedule_work()
{:ok, state}
end
In our example we don’t need to maintain a state so we return {:ok,
state}
without changing anything but before doing so we call our
private function schedule_work/0
to start our first scheduling count
down. We’ll take a closer look at it in a minute.
The start_link/1
function encapsulate the logic responsible for
starting our GenServer
.
def start_link(_args) do
GenServer.start_link(__MODULE__, %{})
end
It isn’t required but it’s a common pattern to wrap the server start logic inside a function in your module so the end-user don’t have to understand the underlying logic.
start_link/1
is really simple, it only calls
GenServer.start_link/3
with current module as the first argument and
an empty map as the second one. This will call our init/1
function
under the hood.
In our example, init/1
will receive %{}
as its parameter. We don’t
really care since we’re not going to use it.
The two functions left represent the heart of our module.
One of the most notable behavior of the GenServer
is its ability to
communicate synchronously and asynchronously. It’s basically a
“receive” loop which is waiting for messages to handle.
handle_info/2
is one of the available callbacks, the most generic
one.
def handle_info(:work, state) do
MyApp.SomeModule.do_some_long_job()
schedule_work()
{:noreply, state}
end
In our example we ask our handle_info/2
function to pattern match
the :work
message. When such an message is sent to our module this
function catches it and does its job.
Its job is to do whatever the scheduled task is supposed to do. For
the sake of the example we’ll say that the business logic to
be accomplished is handled by another module function
MyApp.SomeModule.do_some_long_job/0
.
Then next round of work is then scheduled by calling schedule_work/0
again.
handle_info/2
ends by returning a tuple with an unchanged state.
The last function is a private one, it is not meant to be called
from outside of our MyApp.Scheduler
module.
defp schedule_work() do
Process.send_after(self(), :work, 2 * 60 * 60 * 1000)
end
schedule_work/0
is in charge of managing the delay before two rounds
of work.
This function is called in init/1
to create the first scheduling
when the GenServer
is started. Then every time handle_info/2
is
triggered there’s a scheduling happening and so on.
To handle the scheduling , schedule_work/0
use a very simple trick.
It makes use of Process.send_after/4
to send the :work
message to
self()
(our current module) after two hours (time is expressed in
milliseconds).
So every two hours our handle_info/2
function is called, it does its
processing by calling another module function then it asks
schedule_work/0
to reschedule the task two hours later.
Really simple and handy right?
There’s one gotcha in the previous example.
If our MyApp.SomeModule.do_some_long_job/0
function isn’t
asynchronous and takes some time to complete then our next scheduling
will be delayed. There will be a drift in the schedule.
If you really need your scheduling to be accurate, you should move the
schedule_work/0
call at the beginning of the handle_info/2
function.
def handle_info(:work, state) do
schedule_work()
MyApp.SomeModule.do_some_long_job()
{:noreply, state}
end
This way the scheduling will be the first instruction called and it will be set right away. Then the real work will happen. Two hours later another computing will be done either the previous one is over or not.
All we have left to do is to add our module to the supervision tree so
it will be started along with the application. In a typical mix
application it would be in lib/app_name/application.ex
:
def start(_type, _args) do
# List all child processes to be supervised
children = [
MyApp.Scheduler
]
# See https://hexdocs.pm/elixir/Supervisor.html
# for other strategies and supported options
opts = [strategy: :one_for_one, name: MyApp.Supervisor]
Supervisor.start_link(children, opts)
end
The use-case we just run through is described in the GenServer doc.
Elixir documentation is full of interesting stuff, you should read it carefully before jumping straight away on an external package to achieve your goal.
Using a GenServer
and a simple combination of
handle_info/2
and
Process.send_after/4
is enough for a simple use-case like this one.
It’s not something I need on a daily basis but it happens that I want to be able to create a hash in which I could set or read the value for an arbitrary deep key without even knowing if its ancestor keys exists.
Let’s say I have a variable named hash
that contains a hash:
irb> hash = {}
and I want to know what is the value for hash[:foo][:bar][:baz]
:
irb> hash[:foo][:bar][:baz]
NoMethodError: undefined method `[]' for nil:NilClass
That was pretty predictable. But how do I read these nested values?
To go further, how do I assign a value to some deep key?
irb> hash[:foo][:bar][:baz] = "hello"
NoMethodError: undefined method `[]=' for nil:NilClass
The same kind of exception is raised.
It’s time to create this deep hash by hand and it’s gonna be painful:
irb> hash = {}
=> {}
irb> hash[:foo] ||= {}
=> {}
irb> hash[:foo][:bar] ||= {}
=> {}
irb> hash[:foo][:bar][:baz] = "hello"
=> "hello"
irb> hash
=> {:foo=>{:bar=>{:baz=>"hello"}}}
I’m pretty sure you don’t like to write this kind of thing in your code, do you?
When I’m facing something like that I can’t stop thinking that there’s a better way to do it since Ruby was designed with programmers happiness in mind.
Obviously there’s a better way!
Most of the time in Ruby we create our hashes by using the syntax we
saw above. That’s fine for common needs but you must know that this
syntax is only a syntactic sugar to quickly create a hash but under
the hood it’s a call to the Hash.new
method.
If you read Hash.new
documentation carefully you’ll notice that
there is a signature that allows to pass a block to the Hash.new
call.
This block let you choose how the hash should act when you try to access a key that doesn’t exist. This is exactly what we need to implement our infinitely deep nested hash!
Let’s do it:
irb> hash = Hash.new { |h, k| h[k] = h.dup.clear }
=> {}
irb> hash[:foo][:bar][:baz] = "test"
=> "test"
irb> hash["access"]["only"]
=> {}
irb> hash
=> {:foo=>{:bar=>{:baz=>"test"}}, "access"=>{"only"=>{}}}
Much better!
As you can see we can now assign a value to an arbitrarily deeply nested key in the hash without having to take care of creating ancestors. That’s pretty awesome, isn’t it?
You may ask what’s the sorcery done in our example new
block?
This is kind of recursion in a way. By using h[k] = h.dup.clear
we
are telling that if the key k
is missing we want to duplicate h
,
which is our main hash, then clear its content and store it as the
value of the k
key.
It can seem a bit weird but actually it’s not. This cloning / clearing black magic creates a new dynamic hash as the value for this key by reusing our main hash behavior.
As you have may notice there’s a gotcha you have to be aware of when using this trick.
As soon as you’ll try to access a given key in the hash, it will
create the key with content being what you’ve defined in the new
block.
That’s what happened with the hash["access"]["only"]
call in our
example.
So if you assign a value to a non-existing key, this key and all its missing ancestors will be created and the value will be associated to the key.
But if you try to read the value of a non-existing key, without setting its content, then this key will be created with a value defaulting to what was defined in the block. In our example it’s going to be an empty hash.
Hope that this little tip will help you someday. Have fun and stay safe.
]]>For some reason it was aware of everything in /usr/bin
but not
/usr/local/bin
. For quite a while I thought it was something related
to Emacs.
Then I installed Qute Browser and once again, some binaries available on my system were not in the path when searched from within Qute.
I did some research but didn’t find anything useful. At some point I figured out that if I was starting the GUI app (whether it was Emacs, Qute Browser, MacVim, …) from the terminal, everything was ok. All the binaries on my system could be found.
It got me curious. Why such a different behavior when I launched the app by clicking its icon in the Applications folder or by using Spotlight compared to when I launched it using my term?
Oh boy, this one was a very long road to the true knowledge, the real mastering of Mac OS internals!
The first step to this full understanding was asking myself why my GUI
apps would know about the PATH
environment variable I set in my
shell? It could be set in ~.profile
, ~/.bashrc
, ~/.bash_profile
,
~/.zsh_profile
, ~/.zshrc
, ~/.config/fish/config.fish
, you named
it.
It doesn’t makes any sense unless if you start the app from the shell
knowing the full blown PATH
.
Being confident thanks to this discover I investigated to understand where the GUI apps got their paths from and after some deep diving I got the answer.
EDIT: 2023-07-25
For recent MacOS systems, the solution got easier.
You only have to edit /etc/paths and add the needed paths
in it.
Restart your finder and that's it!
Every single app that is started by clicking its icon or through
spotlight gets its PATH
from whatever is set by launchd
daemon.
Now we know this crucial info there’s one simple step left to
customize the PATH
GUI apps inherit from. It’s as simple as editing
/etc/launchd.conf
like so:
setenv PATH /usr/local/bin:/usr/local/sbin:/usr/bin:/bin:/usr/sbin:/sbin
Now rather than scanning for binaries only in /usr/bin
and
/usr/sbin
, GUI apps are going to search for binaries in all these
paths: /usr/local/bin
/usr/local/sbin
/usr/bin
/bin
/usr/sbin
/sbin
.
If you want your changes to be effective without having to reboot your computer – I hate rebooting my computer – you’ll have to follow some more steps.
This steps will help launchd
and Spotlight to be aware of the new
settings:
$ egrep "^setenv\ " /etc/launchd.conf | xargs -t -L 1 launchctl
This one greps all environment related settings and forward them to
launchd
.
Then you have to restart your Dock
and Spotlight
apps:
$ killall Dock
$ killall Spotlight
Now every GUI app you launch inherits of this PATH env variable, either you launch it by clicking the icon in Applications folder or using Spotlight!
Enjoy!
]]>At this time I evaluated Perl, Python and Ruby. After a while I chose Ruby as I thought it was the cleanest and more enjoyable language out of the three to write scripts. Did I thought that I would use it for web development for the next fifteen years? Not even a second. I chose it to ease my daily job on my Linux system.
Today I’d like to share some tips I learned by using Ruby everyday for scripting. It’s going to be a bunch of one-liners that can be useful to manipulate files and get info out of it.
Sure you can use Perl, Awk / Sed, Python to do the same thing, but I like to do it using Ruby.
Ready? Fasten your belt, we’re going to take off.
In the following example I’m going to use /usr/share/dict/words
as
an input example since most of us have it but you can use the same
one-liners on any file.
In this section, we’re going to see how you can handle spaces in your text files.
The idea is to add an empty line between each line so if your file is composed of one word per line, it will end up with a word, an empty line, a word and so on:
$ cat /usr/share/dict/words | ruby -pe 'puts'
The p
switch tells Ruby to iterate through all lines and the e
switch tells what to do on each one.
So here we print the line then add an empty one.
Now let’s say we want to add two empty lines between each word:
$ cat /usr/share/dict/words | ruby -pe '2.times { puts }'
If you have a file with two newlines after each line, you’ll maybe want to strip the extra newline. There’s more than one way to do it:
$ cat double_newlines.txt | ruby -lne 'BEGIN{$/="\n\n"}; puts $_'
The l
switch will use the value of $/
to chop!
it (understand
remove it) on each line for us.
If we don’t provide the l
flag, we have to remove the double
newlines by ourselves:
$ cat double.txt | ruby -ne 'BEGIN{$/="\n\n"}; puts $_.chop!'
Now we’re going to add an empty line every five lines:
$ cat /usr/share/dict/words | /usr/bin/ruby -pe 'puts if $. % 6 == 0'
Here $.
is the number of the current line we’re are processing. So
if the line number modulo six is equal to zero then we add a new blank
line.
A thing you’ll often want to do when writing scripts dealing with text files is to print the lines numbers or count the number of lines in the file. Here is how to do it using Ruby.
$ cat /usr/shar/dict/words | ruby -ne 'printf("%-6s %s", $., $_)'
This will add the line number on the left side, a space then the word. The line number will be left justified with a six characters pad.
$ cat /usr/shar/dict/words | ruby -ne 'printf("%6s %s", $., $_)'
This will add the line number on the left side, a space then the word. The line number will be right justified with a six characters pad.
Not that this is not very effective, there are other (non one-liners to be used in the term) that will be much more faster.
$ cat /usr/share/dict/words | ruby -ne 'END { puts $. }'
For this file that is near 250k lines it takes 140ms which is still pretty fast to me.
This is something I used to do a lot when I still handled files coming
from Microsoft world. I had to change the text file so that the
Microsoft newline format (\r\n
) was converted to Unix newline format
(\n
):
$ cat /usr/share/dict/words | ruby -lne 'BEGIN{$\="\n"}; print $_'
$ cat /usr/share/dict/words | ruby -lne 'BEGIN{$\="\r\n"}; print $_'
Now we’re going to deal with deleting unwanted spaces.
You’ll sometimes have text files with lines beginning with spaces that you want to remove. Here how to do it:
$ cat leadings_whitespaces.txt | ruby -pe 'gsub(/^\s+/, "")'
We’re substituting everything that is understand as a white space by nothing so there are gone.
You should also want to be able to do the same substitution for trailing white spaces:
$ cat trailing_whitespaces.txt | ruby -pe 'gsub(/\s+$/, $/)'
At some point you’ll maybe want to remove leading and trailing whither spaces from each line:
$ cat leading_and_trailing_whitespaces.txt | ruby -pe 'gsub(/^\s+/, "").gsub(/\s+$/, $/)'
If you’re dealing with a lot of text files you’ll probably want to fix some indentation issues. Here are some tips.
Don’t know why you would want to do this but still 😆
$ cat /usr/share/dict/words | ruby -pe 'gsub($_, " #{$_}")'
This one is more useful:
$ cat /usr/share/dict/words | ruby -ne 'printf("%79s", $_)'
$ cat /usr/share/dict/words | ruby -lne 'puts $_.center(79)'
And now every line of text is centered!
A common need when it comes to text handling is to change something bu something else, let’s see how to do it in one line.
Let’s say we want to change “foo” by “bar” in a text file:
$ cat foo_file.txt | ruby -pe 'tr("foo", "bar")'
Maybe you don’t want to replace every occurrences but only the ones that are on a line that includes “baz”:
$ cat file | ruby -pe 'tr("foo", "bar") if $_ =~ /baz/'
Maybe now you want to replace every occurrences for lines that doesn’t include “baz”:
$ cat file | ruby -pe 'tr("foo", "bar") unless $_ =~ /baz/'
Let’s say you’re a demanding one and you want to be able to change “foo”, “bar” or “baz” by “Bounga”:
$ cat file | ruby -pe 'gsub(/(foo|bar|baz)/, "Bounga")'
Sometimes you’ll have to reverse input, here are some examples.
This is a classic one, for some reason you would want to read the file in reverse order:
$ cat /usr/share/dict/words | ruby -ne 'BEGIN{@arr=Array.new}; @arr.push($_); END{puts @arr.reverse}'
Maybe you’ll want to reverse character of words in every lines:
$ cat /usr/share/dict/words | ruby -lne 'puts $_.reverse'
Let’s say you have a file full of words just like
/usr/share/dict/words
and you want to pair words by 2. Here is a way
to do it with a Ruby one-liner:
$ cat /usr/share/dict/words | ruby -pe '$_ = $_.chomp + " " + gets if $. % 2'
If you’re used to shell, you maybe know that you can split your command on multiple lines by using a backslash. Here’s how to interpret such splitting using Ruby:
$ cat file | ruby -pe 'while $_.match(/\\$/); $_ = $_.chomp.chop + gets; end'
Now you want to level up your game by allowing your user to use an equal sign in the beginning of a line to happen the statement to the previous line:
$ cat file | ruby -e 'puts STDIN.readlines.to_s.gsub(/\n=/, "")'
Let’s print the first line of a file:
$ cat file | ruby -pe 'puts $_; exit'
Now we’ll print the first ten lines:
$ cat file | ruby -pe 'exit if $. > 10'
Now we’re gonna print the last line of a file:
$ cat file | ruby -ne 'line = $_; END {puts line}'
Now we’ll print the first ten lines:
$ cat file | ruby -e 'puts STDIN.readlines.reverse!.slice(0,10).reverse!'
Once again this one isn’t very effective. It’s ok for small files (hundred thousand of lines) but we’re parsing the whole file only to display latest lines.
$ cat file | ruby -pe 'next unless $_ =~ /regexp/'
$ cat file | ruby -pe 'next if $_ =~ /regexp/'
$ cat file | ruby -ne 'puts @prev if $_ =~ /regex/; @prev = $_;'
$ cat file | ruby -ne 'puts $_ if @prev =~ /regex/; @prev = $_;'
Here’s how to print lines that match foo
, bar
and baz
:
$ cat file | ruby -pe 'next unless $_ =~ /foo/ && $_ =~ /bar/ && $_ =~ /baz/'
Now let’s do the same but respecting the order:
$ cat file | ruby -pe 'next unless $_ =~ /foo.*bar.*baz/'
Now we want print each line matching any of the terms specified/
$ cat file | ruby -pe 'next unless $_ =~ /(foo|bar|baz)/'
$ cat file | ruby -ne 'BEGIN{$/="\n\n"}; print $_ if $_ =~ /regexp/'
foo
and bar
and baz
in any order$ cat file | ruby -ne 'BEGIN{$/="\n\n"}; print $_ if $_ =~ /foo/ && $_ =~ /bar/ && $_ =~ /baz/'
foo
and bar
and baz
in order$ cat file | ruby -ne 'BEGIN{$/="\n\n"}; print $_ if $_ =~ /(foo.*bar.*baz)/'
foo
or bar
or baz
$ cat file | ruby -ne 'BEGIN{$/="\n\n"}; print $_ if $_ =~ /(foo|bar|baz)/'
$ cat file | ruby -lpe 'next unless $_.length >= 65'
$ cat file | ruby -lpe 'next unless $_.length < 65'
$ cat file | ruby -pe 'next unless $. >= 2 && $. <= 7'
$ cat file | ruby -pe 'next unless $. == 52'
$ cat file | ruby -pe 'next unless $. >= 4 && $. % 3 == 0'
$ cat file | ruby -pe '@found=true if $_ =~ /regex/; next unless @found'
$ cat file | ruby -ne '@found=true if $_ =~ /foo/; next unless @found; puts $_; exit if $_ =~ /bar/'
$ cat file | ruby -ne '@found = true if $_ =~ /foo/; puts $_ unless @found; @found = false if $_ =~ /bar/'
$ cat file | ruby -ne 'puts $_ unless $_ == @prev; @prev = $_'
$ cat file | ruby -e 'puts STDIN.readlines.sort.uniq!.to_s'
$ cat file | ruby -e 'BEGIN{$/=nil}; puts STDIN.readlines.to_s.gsub(/\n(\n)+/, "\n\n")'
$ cat file | ruby -pe '@lineFound = true if $_ !~ /^\s*$/; next if !@lineFound'
$ cat file | ruby -pe 'next if $. <= 10'
$ cat file | ruby -e 'lines=STDIN.readlines; puts lines [0,lines.size-10]'
$ cat file | ruby -pe 'next if $. % 8 == 0'
$ cat file | ruby -pe 'next if $_ =~ /^\s*$/'
Who said that Perl was the only language to deal with file content manipulation?!
]]>When I first tried to understand and embrace the principle of “let it crash” I quickly wondered what was the right way to recover the state of a GenServer after a crash. The most up-to-date known good state rather that restarting the GenServer from the initial state.
In this post we’ll see how to create a GenServer, monitor it using a supervision tree then how to handle its state so when it crashes it can be restarted using the latest known state.
To illustrate this topic, we’re going to write a sequence server.
Its purpose is to respond to the caller with a number, increment it and wait for another call.
We’ll also allow the user to manually increment the sequence by a delta of its choice.
Let’s create a new project using Mix:
$ mix new --sup sequence
* creating README.md
* creating .formatter.exs
* creating .gitignore
* creating mix.exs
* creating lib
* creating lib/sequence.ex
* creating lib/sequence/application.ex
* creating test
* creating test/test_helper.exs
* creating test/sequence_test.exs
Your Mix project was created successfully.
You can use "mix" to compile it, test it, and more:
cd sequence
mix test
Run "mix help" for more commands.
Now we have a full blown Elixir application with formatter config,
tasks, test files and a lib
directory to host our upcoming code, we
can start to write our mind-blowing server!
When we’ll start our application, our entry point will be the Application module.
Every single Elixir app works this way. There’s a module that use
Application
which defines a standardized directory structure,
configuration and lifecycle.
Our Application
module is located at lib/sequence/application.ex
,
let’s take a look at it:
defmodule Sequence.Application do
# See https://hexdocs.pm/elixir/Application.html
# for more information on OTP Applications
@moduledoc false
use Application
def start(_type, _args) do
children = [
# Starts a worker by calling: Sequence.Worker.start_link(arg)
# {Sequence.Worker, arg}
]
# See https://hexdocs.pm/elixir/Supervisor.html
# for other strategies and supported options
opts = [strategy: :one_for_one, name: Sequence.Supervisor]
Supervisor.start_link(children, opts)
end
end
As you can see in the start
function, a supervisor will watch for all
our children
but we don’t have any for now.
Time to write some code!
The Sequence.Server
module will store and increment a value, we need
create it and then add it to the supervision tree.
Open up the lib/sequence/server.ex
file to write our server
implementation:
defmodule Sequence.Server do
use GenServer
# public API
def start_link(current_number) do
{:ok, _pid} = GenServer.start_link(__MODULE__, current_number, name: __MODULE__)
end
def next_number do
GenServer.call(__MODULE__, :next_number)
end
def increment_number(delta) do
GenServer.cast(__MODULE__, {:increment_number, delta})
end
# GenServer callbacks
def init(initial_state) do
{:ok, initial_state}
end
def handle_call(:next_number, _from, current_number) do
{ :reply, current_number, current_number + 1 }
end
def handle_cast({:increment_number, delta}, current_number) do
{ :noreply, current_number + delta }
end
def format_status(_reason, [ _pdict, state ]) do
[data: [{'State', "Current state: '#{inspect state}'"}]]
end
end
The goal of this blog post is not to explain how GenServer or Elixir works but I want to make sure everyone understand what happens in this module.
First our module take advantage of use GenServer
so it can easily
talk with external processes, receive synchronous and asynchronous
calls, etc.
Next you can see I commented that I structured the code into two main parts, the public interface and a more private one which encapsulate the details of working with a GenServer and its callbacks.
Our public API expose the needed tooling for our client to initialize
a Sequence.Server
, the start_link
function, there also a
next_number
and increment_number
that allow to do the real job. In
fact those two functions will only delegate to GenServer call
and
cast
function that will use our private API.
The private API implements the init
function that will be call by
GenServer.start_link
to set the initial set of our server.
There’s a handle_call
function definition that pattern match on the
:next_number
argument. This function receive the caller info that we
won’t use and the current state of the server, that is the current
number.
All this function does is to reply with the current_number
, and
store current_number + 1
as the new state.
The last function handle_cast
pattern match on {:increment_number,
delta}
tuple, its second argument is the current server state. This
function doesn’t send a response to the caller. Its job is to
increment current_number
of the delta
value and store it as the
new state.
Oh and there’s another function called format_status
, it’s a
standard function of GenServer that is call when the server crashes
for instance. It will be useful for testing purpose.
Now we have a module that does the sequencing job, we can add it to the supervision tree:
def start(_type, _args) do
children = [
# Starts a worker by calling: Sequence.Worker.start_link(arg)
{Sequence.Server, 0}
]
# See https://hexdocs.pm/elixir/Supervisor.html
# for other strategies and supported options
opts = [strategy: :one_for_one, name: Sequence.Supervisor]
Supervisor.start_link(children, opts)
example
So now when our application starts, it will create a process that runs
our Sequence.Server
with the default state equals to zero. We used
the strategy one_for_one
so if our process crashed, the supervisor
is going to start a fresh new one.
To test-drive our new sequence module we are going to use the Elixir REPL iex:
$ iex -S mix
iex(1)> Sequence.Server.increment_number(12)
:ok
iex(2)> Sequence.Server.next_number
12
iex(3)> Sequence.Server.increment_number(3)
:ok
iex(4)> Sequence.Server.next_number
16
iex(5)> Sequence.Server.next_number
17
Our sequence server is working great! But it’s not very robust.
If we call increment_number
with something that is not a number,
it’ll crash. But since we have a supervisor and a strategy defined it
should restart:
iex(6)> Sequence.Server.increment_number(nil)
:ok
iex(7)>
00:40:56.745 [error] GenServer Sequence.Server terminating
** (ArithmeticError) bad argument in arithmetic expression
:erlang.+(8, nil)
(sequence) lib/sequence/server.ex:28: Sequence.Server.handle_cast/2
(stdlib) gen_server.erl:637: :gen_server.try_dispatch/4
(stdlib) gen_server.erl:711: :gen_server.handle_msg/6
(stdlib) proc_lib.erl:249: :proc_lib.init_p_do_apply/3
Last message: {:"$gen_cast", {:increment_number, nil}}
State: [data: [{'State', "Current state: '8'"}]]
It crashed as expected. Now what happens if we try to use it again?
iex(8)> Sequence.Server.next_number
0
Damn! Our sequence process has restarted but… the state was lost. We started over at 0, the initial value of the sequence server.
We need to find a way to keep the latest value across sequence server crashes. After all that’s the whole point of this blog post!
If our GenServer was stateless we’d be good and we can keep writing more features. But in our example preserving state if the sequence server crashes is a main concern.
So how can we keep our state across GenServer crashes to be able to send an up-to-date value?
It’s ok that your inner code crashes and it won’t have a real bad effect on your client. What matters is that you’re able to provide your clients with data as fresh as possible.
Our supervisor simply restart our sequence server with its initial state. Preserving processes state is not its jobs.
So what’s the best way to be able to use an up-to-date state in our sequence server?
Don’t think too much, choose the easy path. You should use a separate process to handle state. With separate processes you don’t care if the sequence server crashes since the state is stored somewhere else.
Now let’s write a module which only purpose will be to store the state.
defmodule Sequence.Stash do
use Agent
def start_link(initial_value) do
Agent.start_link(fn -> initial_value end, name: __MODULE__)
end
def get() do
Agent.get(__MODULE__, & &1)
end
def update(new_value) do
Agent.update(__MODULE__, fn _state -> new_value end)
end
end
Agents are an abstraction in Elixir dedicated to store and share state across processes. That’s exactly what we need!
Since we use the good tool for the good job, the code we had to write is really short and simple.
We had to start the agent with start_link
, implement a way to
retrieve the current value to do so we used Agent.get
providing the
current module name as first argument and an anonymous function which
simply returns the value of the first argument it is provided with
that is the current state of the agent, our counter.
We also implemented a way to update the agent state by using
Agent.update
, still with the current module name as first argument
and the new value to store as second argument.
Now we have a dedicated module to store our sequence value, we need to start it with the application and ensure it will always run.
We can be pretty confident with this module robustness. Its code is so simple that it would be hard to crash it.
So let’s add it to the supervision tree.
As you may remember, we used one_for_one
strategy for our sequence
server but there are other strategies available.
When you add a module to the supervision tree, you should always ask yourself what is the strategy that better fits your needs.
There are three main strategies:
one_for_one
restarts the process and only this one if it crashesone_for_all
restarts all the child processes when this one crashesrest_for_one
restarts the crashed process and all those that were
started after himDepending of your needs and how you built your dependencies between
your modules, you should choose the right one. There’s also
DynamicSupervisor
that is suited to attached children to the
supervision tree dynamically but that’s beyond the scope of this blog
post.
If your module can be killed and restarted without impacting anything
else you should go for one_for_one
.
If your module crashed and that it would create a inconsistency across
the app after it restarted, you should go for one_for_all
.
If only modules declared after the one that crashed would be affected
you should go for rest_for_one
.
Enough talking, get back to the code and our supervisor:
defmodule Sequence.Application do
@moduledoc false
use Application
def start(_type, _args) do
children = [
{ Sequence.Stash, 0 },
{ Sequence.Server, nil }
]
opts = [strategy: :rest_for_one, name: Sequence.Supervisor]
Supervisor.start_link(children, opts)
end
end
So we added Sequence.Stash
to the supervision tree, at the first
position, with a default value of 0
. We added it first because our
Sequence.Server
relies on it. It makes sense in my opinion.
We changed the default state of Sequence.Server
to nil
since this
module doesn’t need to handle its state for itself. That’s the
Sequence.Stash
job.
If you looked closely, you’ll noticed we have changed our strategy
from one_for_one
to rest_for_one
. This is not a needed change. Our
code would have worked without it. This is more of a way to express
the intention. It’s here to say “hey if Stash crashes we loose
everything and have to restart”.
Now we need to update our Sequence.Server
to make use of our new
module that handles the state.
It’s going to be easy:
defmodule Sequence.Server do
use GenServer
# Public API
def start_link(stash_pid) do
{:ok, _pid} = GenServer.start_link(__MODULE__, stash_pid, name: __MODULE__)
end
def next_number do
GenServer.call(__MODULE__, :next_number)
end
def increment_number(delta) do
GenServer.cast(__MODULE__, {:increment_number, delta})
end
# GenServer implementation
def init(_args) do
current_number = Sequence.Stash.get()
{:ok, current_number}
end
def handle_call(:next_number, _from, current_number) do
{:reply, current_number, current_number + 1}
end
def handle_cast({:increment_number, delta}, current_number) do
{:noreply, current_number + delta}
end
def terminate(_reason, current_number) do
Sequence.Stash.update(current_number)
end
end
As you can see our module now makes use of Sequence.Stash
to store
value. By doing this we can delegate the value storing to another
module. This module logic is very simple and thus it avoid unexpected
crash. It’s the best way to ensure your Elixir code robustness.
Now let’s see what happens when it crashes.
$ iex -S mix
iex> Sequence.Server.next_number
0
iex> Sequence.Server.next_number
1
iex> Sequence.Server.next_number
2
iex> Sequence.Server.increment_number "cat"
:ok
iex>
12:15:48.424 [error] GenServer Sequence.Server terminating
** (ArithmeticError) bad argument in arithmetic expression
iex> Sequence.Server.next_number
3
iex> Sequence.Server.next_number
4
iex> Sequence.Server.next_number
5
:ok
I think that this OTP feature is a really cool way to handle unexpected crashes.
You now have code that can crash and recover without losing its previous state.
We use an Agent here to store the value in memory but the exact same technique could be used to store and retrieve value using a database, a file on the disk, a web service, …
I made the code available if you want to read or play with it.
]]>priv/gettext/[LOCALE]/LC_MESSAGES/default.po
and it can easily
become a big mess. So I started to search for a way to split my
translations by domains. It’s not a thing that is explained in the
(really good) Phoenix
guides.
It took me some time to figure out how to do it the right way and that’s mainly because I was searching through the Phoenix documentation when the real answer was available in the underlying lib that handle translations gettext and its Elixir bridge.
Gettext is used for translation since forever in free software world. It’s a battle tested library that has everything you need when it comes to translations. It can do simple translations, handle plural translations and domain-based translations.
Coming from Ruby and Rails world I’m really used to the ecosystem specific solution (a.k.a i18n gem and YAML files) to handle translation.
To be honest, when I started using Rails, I was wondering why the community wasn’t using gettext since it was the most standard i18n library I was aware of. It was used everywhere.
When I saw that Phoenix was using gettext I got a mixed feeling of “OMG back to this old lib” and “Yeah this good old gettext!”.
After using it a little bit I quickly told to myself “why do we reinvent the wheel when there’s something that good out there?”.
The format is easy to learn and there’s a bunch of tools available to translate strings.
gettext "Title"
searches for a key (msgid) named Title
in the
default namespace.
So in your .eex
file you’ll get something like:
<tr>
<th colspan="2"><%= gettext "Status" %></th>
<th><%= gettext "Title" %></th>
<th><%= gettext "Brand" %></th>
<th><%= gettext "Description" %></th>
</tr>
where gettext will search in the default namespace (default.po) for
msgid Status
, Title
, Brand
, and Description
. If no translation
is found for the current language then the string will be used as is.
To handle translation you have files with two extensions. The first
one is .pot
(e.g. priv/gettext/default.pot
), one per domain, which
is generated by scanning the app code and lists all keys. You then
have one .po
file per locale / domain (e.g.
priv/gettext/fr/LC_MESSAGES/default.po
), this is where you’ll
actually put the translations.
I’m pretty ashamed of having searched so much to find out how to use
custom domains / files for translations when the answer was pretty
much in the dgettext
function.
Gettext.dgettext(Api.Gettext, "additionals", "In progress")
The first argument is the backend used for translation. In a typical
Phoenix app it’ll be YourApp.Gettext
.
The second argument is the domain is which gettext will search. In our
example it means that the translations will be in
priv/gettext/additionals.pot
and
priv/gettext/[locale]/LC_MESSAGES/additionals.po
files. Yes the
domain is determined by the file name.
The third and last argument is the msgid
or in other words the key
and untranslated text.
I think that if your app becomes big enough, it’s a good strategy to divide your translations in multiple contextualized files to avoid collisions and ease translation process.
Hope you’ll find this useful.
]]>